25 Irresistible Single Serve Dessert Recipes to Satisfy Your Sweet Tooth
Craving something sweet without the fuss of sharing? These 15 single serve dessert recipes are just the ticket! Whether you’re in the mood for a warm mug cake, a quick parfait, or a little glass of chocolate mousse, we’ve got you covered.
Each recipe is designed for one, so you can indulge without the leftovers hanging around. Perfect for late-night cravings or a little afternoon treat, these desserts are quick to whip up and easy to customize.
You don’t need to get fancy here; just grab a few ingredients and let your creativity flow. So, roll up your sleeves and get ready to satisfy your sweet tooth—whether you’re at home or on a break from your busy day, you deserve a delicious treat just for you!
Each recipe includes a list of ingredients in both metric and imperial measurements, making it super easy to follow. Plus, we’ve broken down the instructions into simple steps, so you can get straight to the good part—enjoying your delightful dessert!
Microwave Peanut Butter Cookie
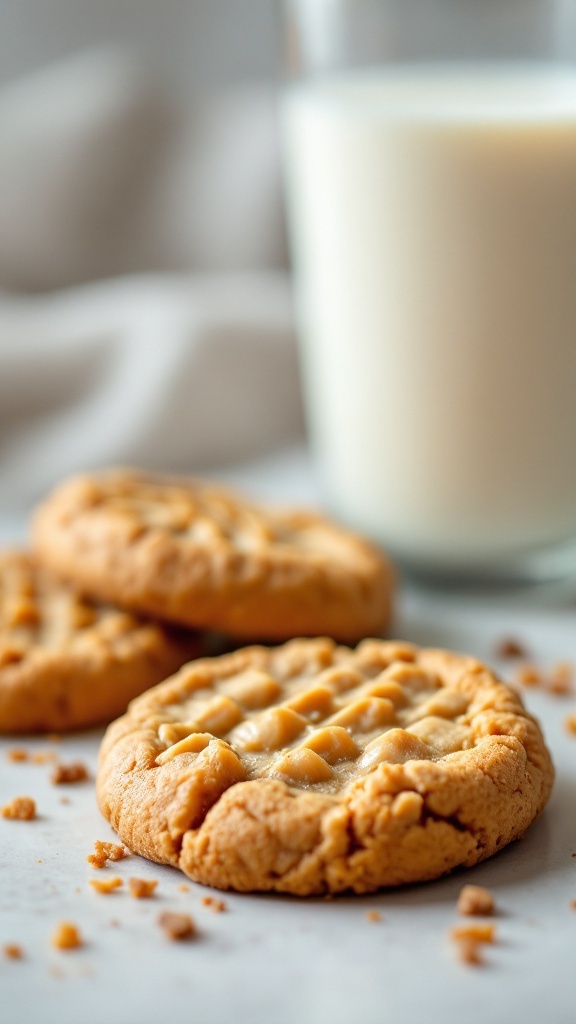
If you’re craving something sweet but short on time, this microwave peanut butter cookie is just what you need. It’s rich, chewy, and delivers that satisfying peanut butter flavor in just a few minutes. Plus, it’s so easy to whip up, making it a perfect treat for one.
In just a couple of minutes, you can enjoy a warm, melty cookie that pairs wonderfully with a glass of milk. The best part? You only need a few simple ingredients, and there’s no need to preheat the oven. Whether you’re treating yourself after a long day or satisfying a late-night snack craving, this quick dessert is sure to hit the spot.
Ingredients
- 2 tablespoons peanut butter (30g)
- 1 tablespoon granulated sugar (12g)
- 1/4 teaspoon vanilla extract
- 1/4 teaspoon baking powder
- 1 tablespoon all-purpose flour (8g)
- 1 tablespoon milk (15ml)
Instructions
- In a microwave-safe mug, combine peanut butter, sugar, vanilla extract, baking powder, flour, and milk.
- Mix until all ingredients are well combined and form a dough.
- Microwave on high for about 30-40 seconds. Start checking at 30 seconds to avoid overcooking.
- Allow the cookie to cool slightly before enjoying.
Chocolate Lava Mug Cake
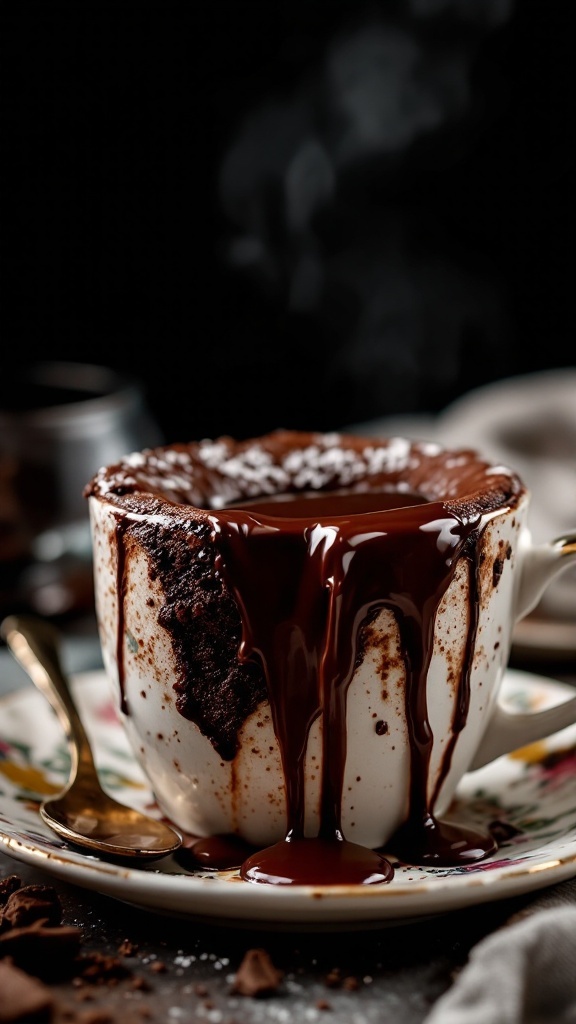
Chocolate Lava Mug Cake is a delightful treat that satisfies any chocolate craving in just a few minutes. This easy-to-make mug cake is rich, gooey, and has a molten center that flows out as you dig in. It’s perfect for when you want something sweet without the fuss of a full-sized dessert.
This single-serve recipe is not only simple but also quick, making it an ideal choice for a late-night snack or a cozy afternoon pick-me-up. Just a few pantry staples and a microwave are all you need to whip up this indulgent cake. Each bite is filled with warm chocolate goodness, making it a delightful choice for chocolate lovers.
Ingredients
- 4 tablespoons all-purpose flour (30 g)
- 4 tablespoons granulated sugar (50 g)
- 2 tablespoons unsweetened cocoa powder (15 g)
- 1/8 teaspoon baking powder
- 3 tablespoons milk (45 ml)
- 2 tablespoons vegetable oil
- 1/4 teaspoon vanilla extract
- 1 square (about 1 oz or 28 g) semi-sweet chocolate (for the lava center)
Instructions
- In a microwave-safe mug, combine flour, sugar, cocoa powder, and baking powder. Mix well.
- Add milk, vegetable oil, and vanilla extract to the dry ingredients. Stir until smooth.
- Push the square of chocolate into the center of the batter.
- Microwave the mug cake on high for about 40-60 seconds. Keep an eye on it, as cooking times may vary based on your microwave’s wattage.
- Let it cool for a minute, then enjoy the warm, gooey chocolate lava cake right from the mug!
Single Serve Tiramisu
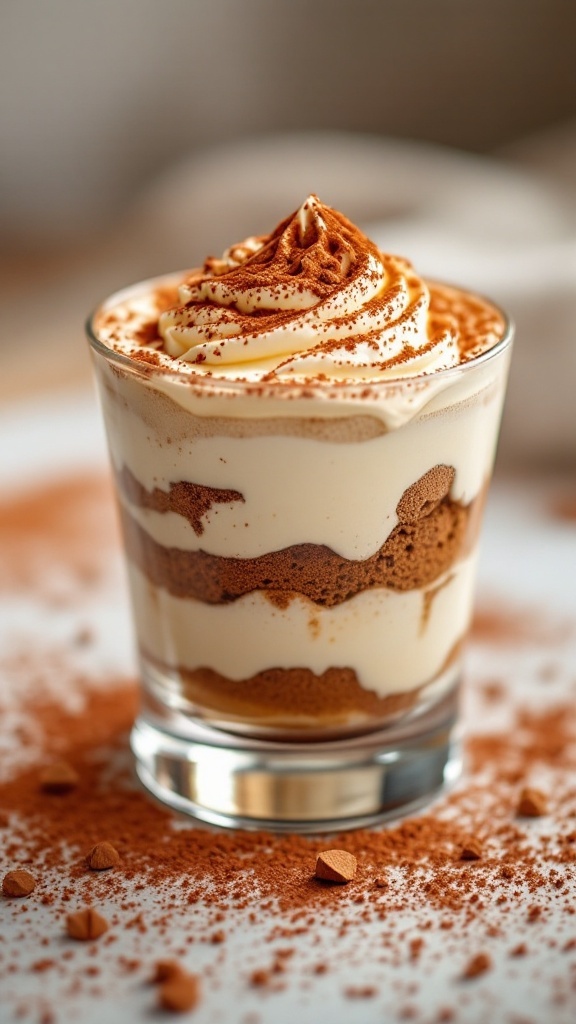
Single serve tiramisu is a delightful Italian dessert that brings rich flavors and creamy textures right to your table. With layers of coffee-soaked ladyfingers and a luscious mascarpone mixture, this treat is both indulgent and satisfying. Perfect for when you’re craving something sweet but don’t want to share!
This recipe is simple to make, requiring no baking, making it an ideal choice for both novice cooks and seasoned bakers. Just a few ingredients come together to create a dessert that feels special, yet is easy enough for any occasion.
Ingredients
- 1 cup brewed espresso or strong coffee, cooled
- 2 tablespoons coffee liqueur (optional)
- 100g (3.5 oz) ladyfingers
- 250g (8.8 oz) mascarpone cheese
- 1/2 cup heavy cream
- 50g (1.75 oz) granulated sugar
- 1 teaspoon vanilla extract
- Cocoa powder for dusting
Instructions
- Mix the Coffee: In a shallow dish, combine the cooled espresso and coffee liqueur.
- Soak the Ladyfingers: Quickly dip each ladyfinger into the coffee mixture, ensuring they are soaked but not soggy.
- Prepare the Mascarpone Mixture: In a mixing bowl, beat the mascarpone cheese, heavy cream, sugar, and vanilla extract until smooth and creamy.
- Layer the Dessert: In a serving glass, add a layer of soaked ladyfingers, followed by a layer of the mascarpone mixture. Repeat until the glass is filled, finishing with the mascarpone on top.
- Chill: Refrigerate for at least 2 hours to allow the flavors to meld.
- Serve: Before serving, dust the top with cocoa powder for a finishing touch.
Vanilla Bean Panna Cotta
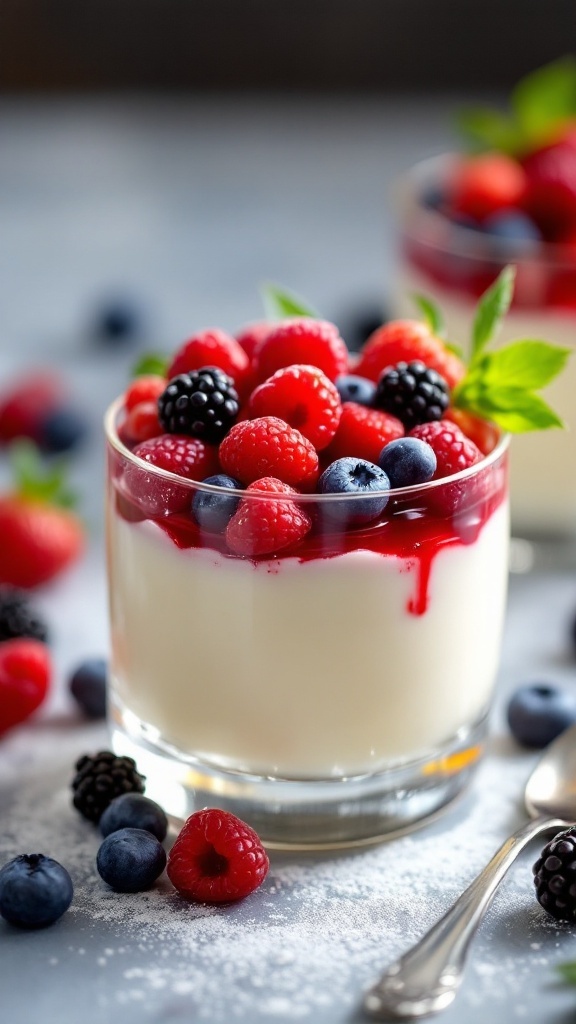
Vanilla Bean Panna Cotta is a delightful Italian dessert that offers a creamy texture and subtle vanilla flavor. This dessert is light yet satisfying, making it perfect for a sweet treat after dinner. With just a few ingredients and simple steps, you can whip up this elegant dish in no time.
The panna cotta sets beautifully, creating a smooth and silky treat that pairs wonderfully with fresh berries or a fruit compote. It’s a great choice for those who want a dessert that feels indulgent but is actually quite straightforward to make. Whether you’re hosting a dinner party or treating yourself, this panna cotta is sure to impress!
Ingredients
- 2 cups heavy cream (480 ml)
- 1/2 cup granulated sugar (100 g)
- 1 teaspoon vanilla bean paste or seeds from 1 vanilla bean
- 1 packet (2 1/4 teaspoons) gelatin powder
- 3 tablespoons cold water (45 ml)
- Fresh berries for topping (optional)
Instructions
- Bloom the Gelatin: In a small bowl, sprinkle the gelatin over cold water. Let it sit for about 5 minutes until it softens.
- Heat the Cream: In a saucepan, combine heavy cream and sugar. Stir over medium heat until the sugar dissolves and the mixture is hot but not boiling.
- Add Vanilla: Stir in the vanilla bean paste or seeds. Remove the saucepan from heat.
- Incorporate Gelatin: Add the bloomed gelatin to the warm cream mixture, stirring until fully dissolved.
- Pour and Chill: Pour the mixture into individual serving glasses or molds. Refrigerate for at least 4 hours or until set.
- Serve: Once set, top with fresh berries if desired and enjoy!
Lemon Blueberry Cupcake
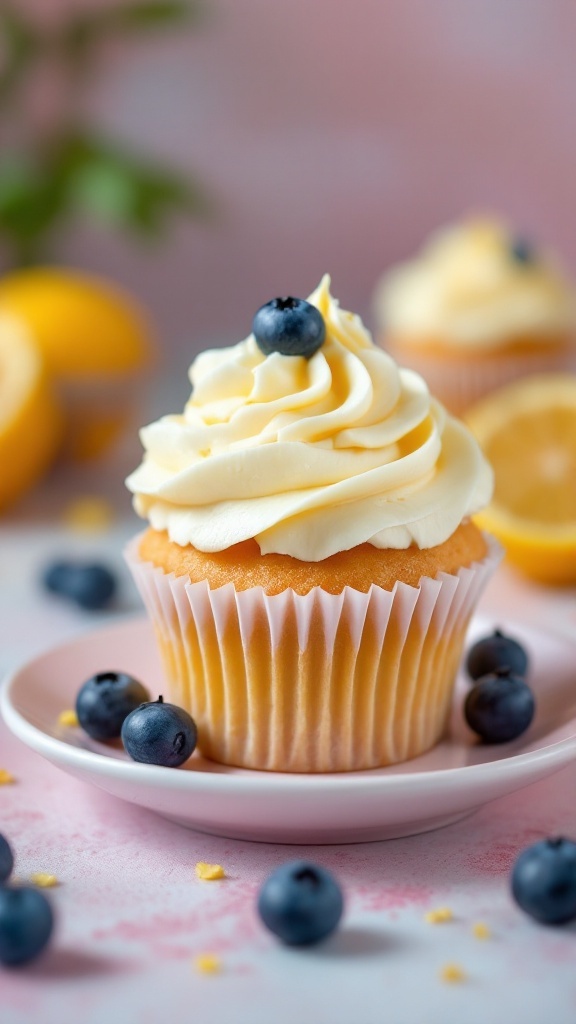
Lemon blueberry cupcakes are a delightful treat that combines the zesty flavor of lemon with the sweetness of fresh blueberries. They are light, fluffy, and bursting with fresh, fruity goodness. Perfect for any occasion, these cupcakes are easy to make and sure to impress friends and family.
The tartness from the lemon pairs beautifully with the juicy blueberries, creating a refreshing dessert that’s perfect for warm days. Topped with a creamy frosting, these cupcakes offer a delightful balance of flavors that makes each bite enjoyable. Whether you’re craving something sweet or looking to celebrate a special moment, lemon blueberry cupcakes are an excellent choice!
Ingredients
- 100g (1/2 cup) all-purpose flour
- 75g (1/3 cup) granulated sugar
- 1 1/2 teaspoons baking powder
- 1/4 teaspoon salt
- 1 large egg
- 50ml (1/4 cup) milk
- 30ml (2 tablespoons) vegetable oil
- 1 tablespoon lemon juice
- 1 teaspoon lemon zest
- 50g (1/2 cup) fresh blueberries
Instructions
- Preheat your oven to 180°C (350°F) and line a cupcake tray with paper liners.
- In a mixing bowl, combine flour, sugar, baking powder, and salt.
- In another bowl, whisk together the egg, milk, oil, lemon juice, and lemon zest until well combined.
- Pour the wet ingredients into the dry ingredients and mix until just combined.
- Gently fold in the blueberries, being careful not to overmix.
- Divide the batter evenly among the cupcake liners, filling each about two-thirds full.
- Bake for 15-18 minutes or until a toothpick inserted comes out clean.
- Let the cupcakes cool completely before frosting them with your favorite icing.
Mini Cheesecake with Berry Compote
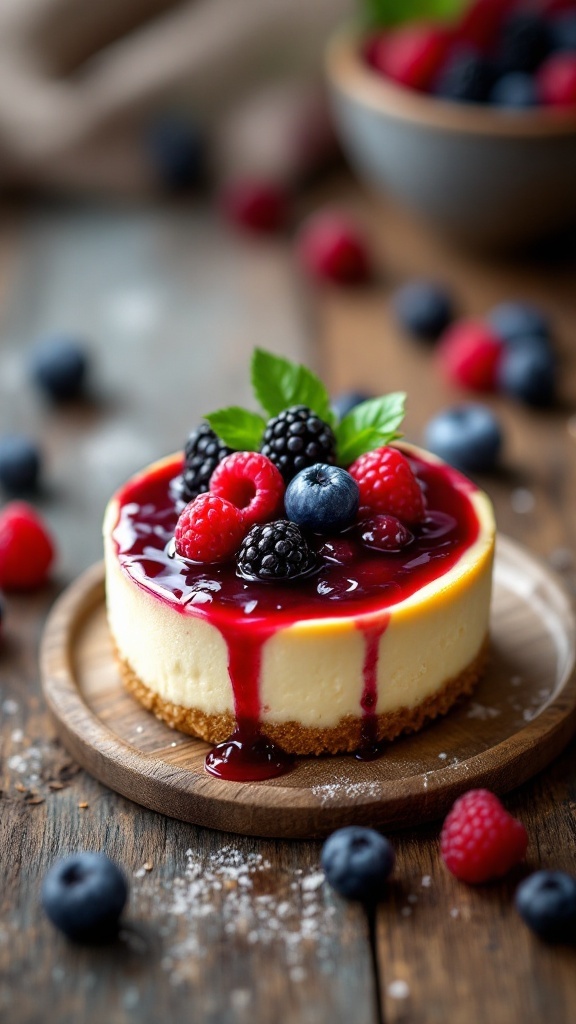
Mini cheesecakes are a delightful treat that pack all the creamy goodness of traditional cheesecake into a perfectly portioned size. Topped with a bright and tangy berry compote, these little desserts are not only delicious but also visually appealing. Whether you’re looking for a sweet finish to a meal or a special snack, this recipe is simple enough for anyone to whip up.
The smooth cream cheese filling has a subtle sweetness that pairs beautifully with the tartness of the berries. Plus, these mini cheesecakes are great for sharing, or you can keep them all to yourself! They are a fun way to enjoy a classic dessert in a convenient size.
Ingredients
- 150g (1 1/2 cups) digestive biscuits, crushed
- 75g (1/3 cup) unsalted butter, melted
- 225g (8 oz) cream cheese, softened
- 50g (1/4 cup) granulated sugar
- 1 teaspoon vanilla extract
- 1 large egg
- 150g (1 cup) mixed berries (raspberries, blueberries, blackberries)
- 50g (1/4 cup) berry jam
Instructions
- Preheat your oven to 160°C (320°F). Line a muffin tray with paper liners.
- In a bowl, mix the crushed biscuits with melted butter until combined. Press this mixture into the bottom of each muffin liner to form the crust.
- In another bowl, beat the cream cheese, sugar, and vanilla until smooth. Add the egg and mix until just combined.
- Pour the cream cheese mixture over the crusts in the muffin tray, filling each liner about 3/4 full.
- Bake in the preheated oven for 15-20 minutes, or until just set. Let cool completely.
- In a small saucepan, combine the mixed berries and jam. Heat over low until the berries soften and the mixture is saucy.
- Once the cheesecakes are cooled, spoon the berry compote on top before serving.
Chocolate Mousse in a Jar
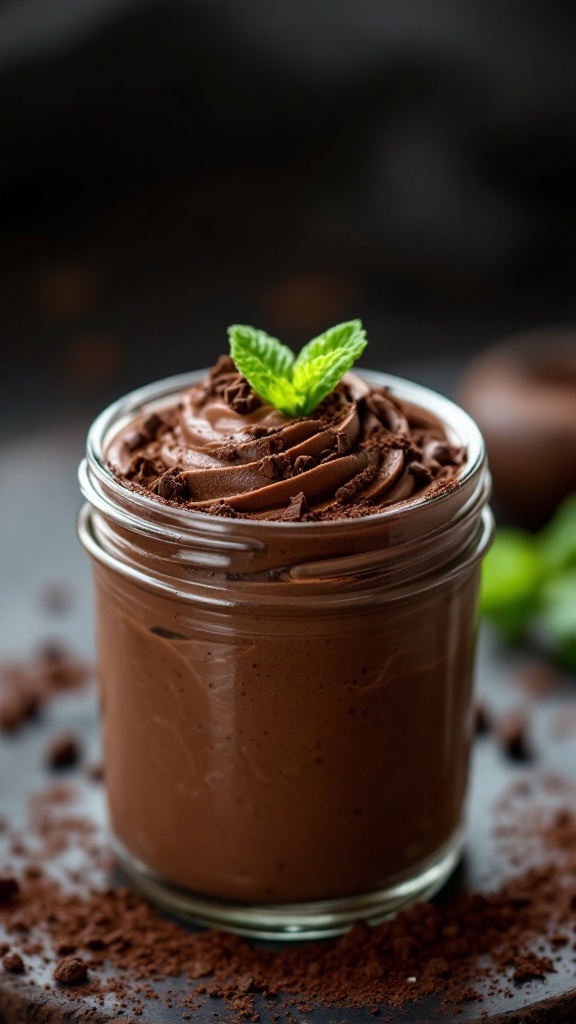
Chocolate mousse in a jar is a delightful treat that combines rich chocolate flavor with a light and airy texture. This dessert is both creamy and indulgent, making it a perfect way to satisfy your sweet tooth. Plus, it’s incredibly simple to whip up, requiring just a few ingredients!
Served in individual jars, this dessert not only looks appealing but also makes it easy to portion out. Whether you’re hosting a dinner party or simply treating yourself, chocolate mousse in a jar is sure to impress. It can be enjoyed right away or chilled for a bit for a firmer texture. Let’s take a look at how to make this delicious dessert.
Ingredients
- 200 g dark chocolate (7 oz)
- 3 large eggs, separated
- 50 g granulated sugar (1/4 cup)
- 200 ml heavy cream (3/4 cup)
- 1 teaspoon vanilla extract
- Pinch of salt
Instructions
- Melt the chocolate: In a heatproof bowl, melt the dark chocolate over a pot of simmering water. Stir until smooth, then set aside to cool slightly.
- Whisk egg whites: In a clean bowl, beat the egg whites with a pinch of salt until they form stiff peaks. Gradually add the sugar, continuing to whisk until glossy.
- Combine yolks: In another bowl, whisk the egg yolks into the melted chocolate until well mixed.
- Fold in cream: Whip the heavy cream with the vanilla extract until soft peaks form. Gently fold the whipped cream into the chocolate mixture.
- Add egg whites: Carefully fold in the beaten egg whites, being cautious not to deflate the mixture.
- Chill and serve: Spoon the mousse into jars and refrigerate for at least 2 hours before serving. Enjoy your delicious chocolate mousse!
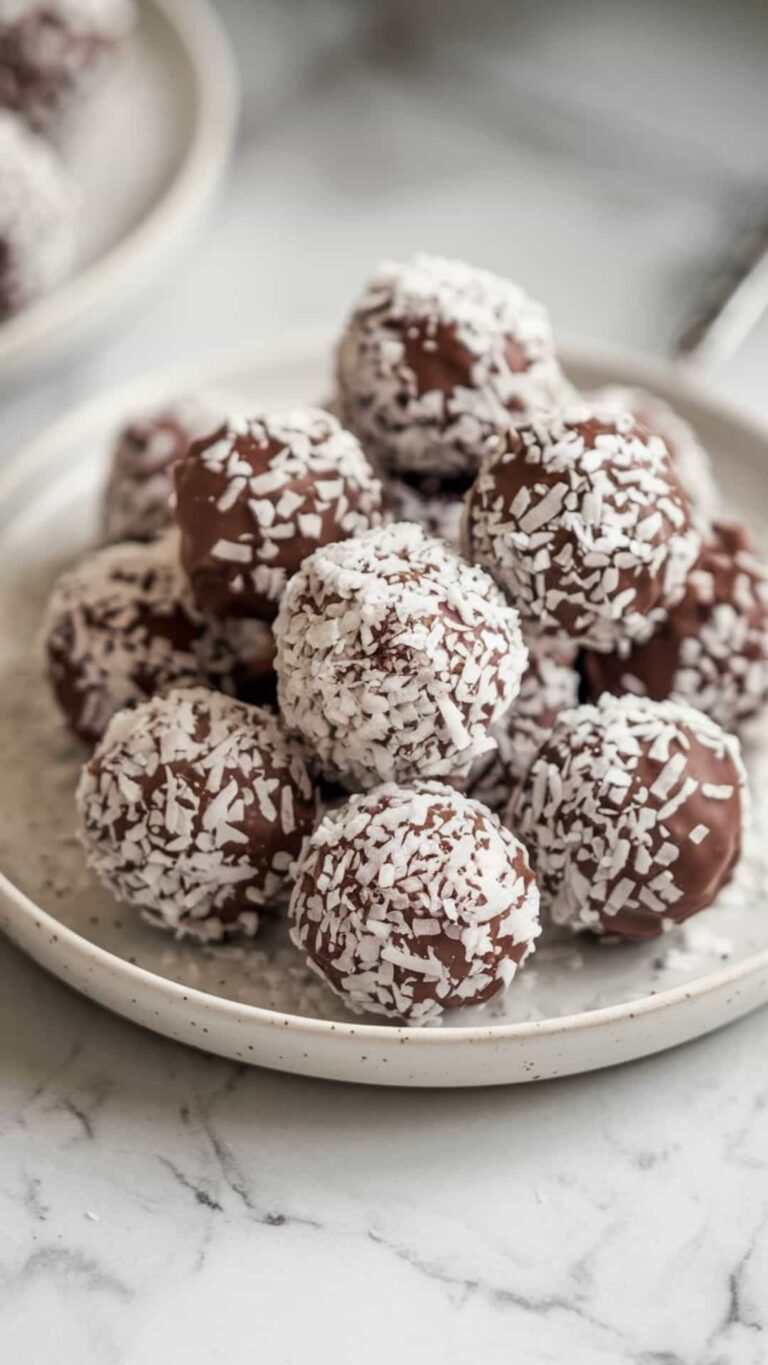
Coconut Macaron with Dark Chocolate
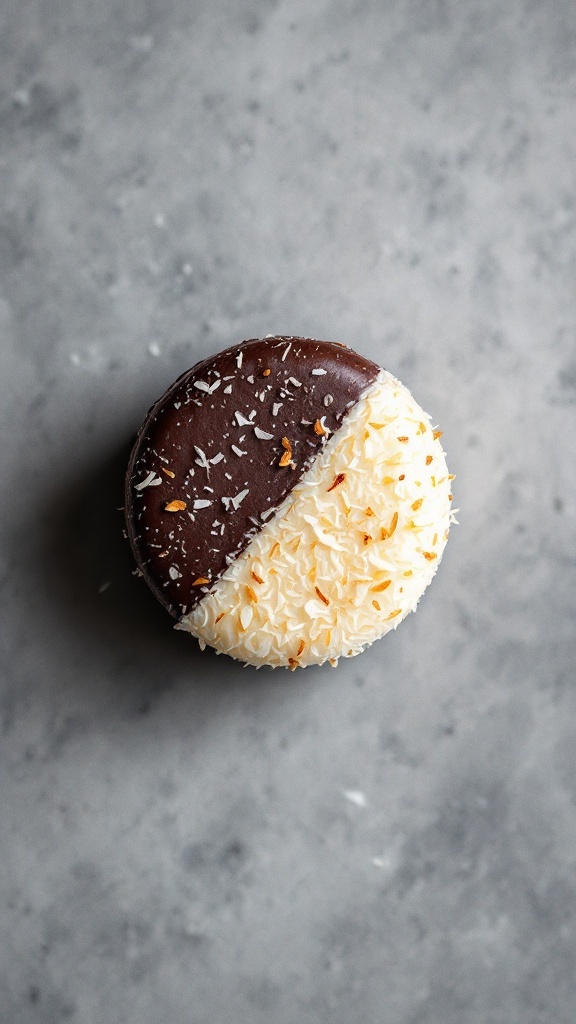
Coconut Macarons with Dark Chocolate are a delightful treat that combines chewy coconut and rich chocolate. These bite-sized desserts have a lovely texture that contrasts the smooth chocolate coating with the soft, sweet coconut inside. They offer a tropical flavor that’s both refreshing and indulgent, making them a hit for any occasion.
The best part? Making these macarons is quite simple! You don’t need any fancy equipment or complicated techniques, just a few ingredients and a little bit of patience. Once you’ve made the base, dipping them in dark chocolate adds a decadent touch that elevates the whole experience. Plus, they’re perfect for a single serving dessert when you’re craving something sweet without the leftovers.
Ingredients
- 150g (1 ½ cups) shredded unsweetened coconut
- 100g (½ cup) granulated sugar
- 2 large egg whites
- ½ teaspoon vanilla extract
- ¼ teaspoon salt
- 100g (3.5 oz) dark chocolate, chopped
Instructions
- Preheat your oven to 180°C (350°F) and line a baking sheet with parchment paper.
- In a bowl, mix shredded coconut, sugar, egg whites, vanilla extract, and salt until well combined.
- Using a spoon, drop rounded tablespoons of the mixture onto the prepared baking sheet, leaving space between each.
- Bake for 15-20 minutes, or until the edges are golden brown. Allow them to cool completely on the baking sheet.
- While the macarons cool, melt the dark chocolate in a microwave or over a double boiler until smooth.
- Dip the cooled macarons halfway into the melted chocolate and place them on a wire rack or parchment paper to set.
- Once the chocolate has hardened, enjoy your delicious Coconut Macarons!
Espresso Affogato
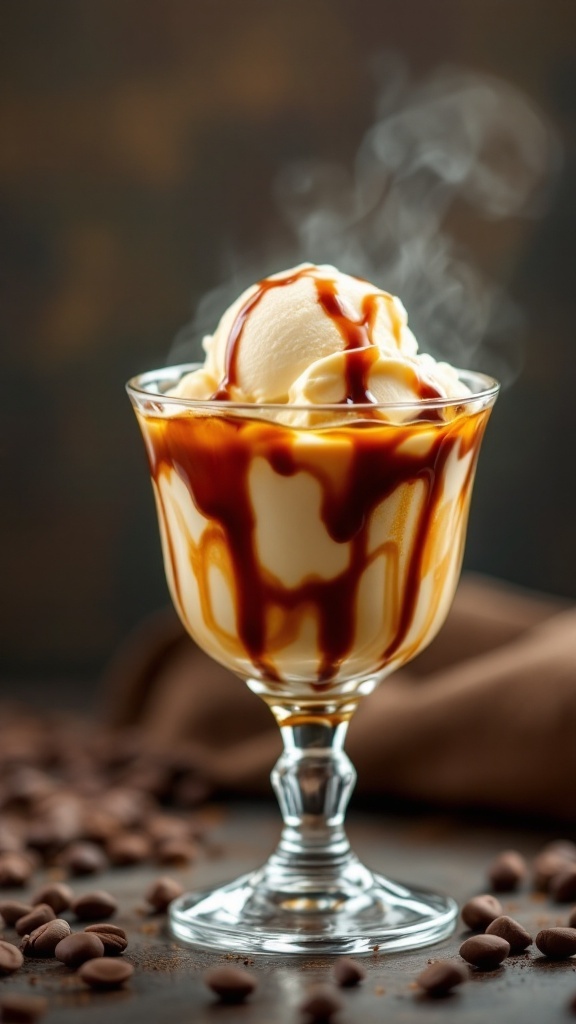
Espresso Affogato is a delightful treat that combines rich espresso with creamy vanilla ice cream. The hot espresso is poured over the cold ice cream, creating a contrast that is both refreshing and indulgent. This dessert is not only delicious but also incredibly simple to prepare, making it a perfect option for coffee lovers looking for a quick sweet fix.
The taste is a harmonious blend of the deep, bold flavors of espresso and the smooth sweetness of ice cream. With just a few ingredients, you can whip up this satisfying dessert in no time, making it a go-to choice for any occasion, whether it’s a casual evening at home or a dinner party with friends.
Ingredients
- 1 shot (30 ml) of espresso
- 1 scoop (about 75 g) of vanilla ice cream
- 1 tablespoon (15 ml) of coffee liqueur (optional)
- Chocolate or caramel sauce for drizzling (optional)
Instructions
- Prepare the Espresso: Brew a shot of fresh espresso using your preferred method.
- Scoop the Ice Cream: In a serving glass or bowl, place a generous scoop of vanilla ice cream.
- Pour the Espresso: Carefully pour the hot espresso over the ice cream, allowing it to melt slightly.
- Add Liqueur: If using, drizzle the coffee liqueur over the top.
- Finish with Sauce: Add a drizzle of chocolate or caramel sauce for an extra touch of sweetness.
- Serve Immediately: Enjoy your Espresso Affogato right away for the best experience!
Caramel Apple Crisp
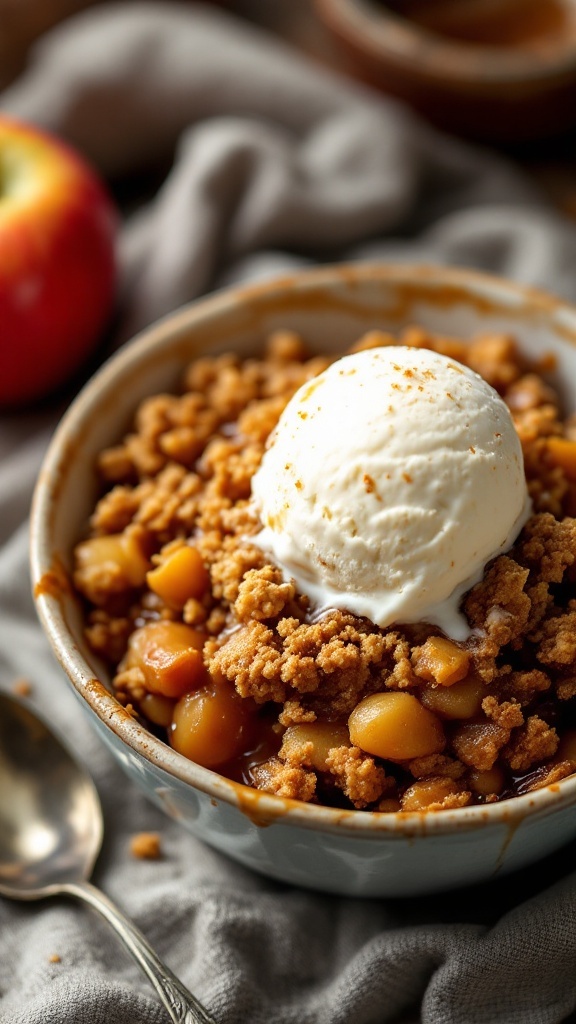
Caramel apple crisp is a delightful dessert that brings a combination of sweet, tart apples and a crunchy topping together. The warm apples are coated in a rich caramel sauce, creating a comforting dessert that everyone enjoys. It’s simple to make and perfect for a cozy night in or as a sweet treat after dinner.
This recipe offers a balance of flavors and textures, with soft, tender apples underneath a crispy, buttery topping. Topped with a scoop of vanilla ice cream, it’s hard to resist going back for seconds. Enjoy this easy-to-make treat any time of the year!
Ingredients
- 2 apples, peeled and chopped
- 1/4 cup caramel sauce
- 1/2 cup rolled oats
- 1/2 cup all-purpose flour
- 1/3 cup brown sugar
- 1/4 cup unsalted butter, melted
- 1/2 teaspoon ground cinnamon
- 1/4 teaspoon salt
Instructions
- Preheat your oven to 350°F (175°C).
- In a small bowl, mix the chopped apples with the caramel sauce until well coated.
- In another bowl, combine the oats, flour, brown sugar, melted butter, cinnamon, and salt. Stir until crumbly.
- Place the caramel-coated apples in a baking dish and sprinkle the oat mixture evenly on top.
- Bake for 25-30 minutes, or until the topping is golden brown and the apples are tender.
- Let it cool slightly before serving with vanilla ice cream on top.
Banana Foster Sundae
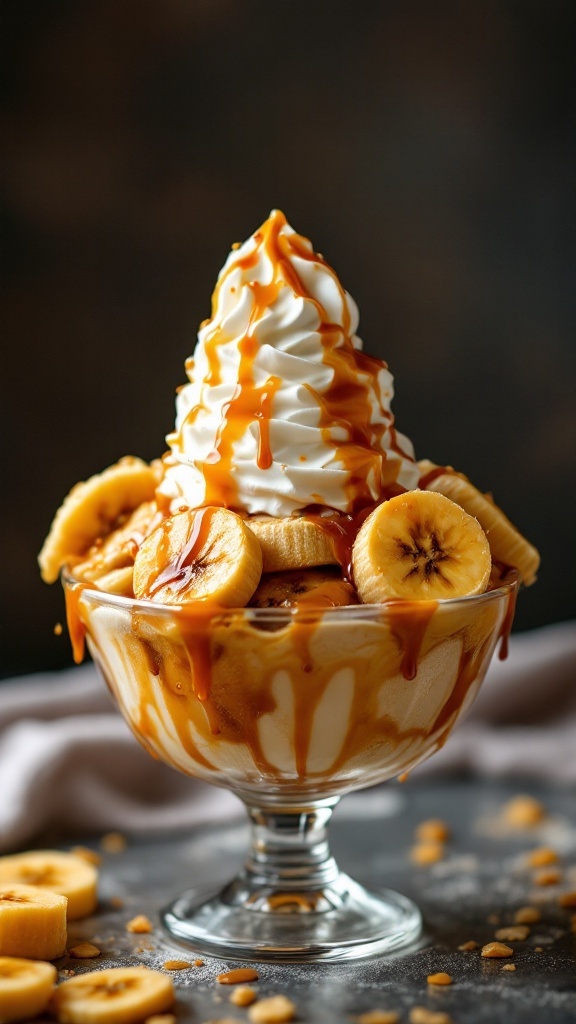
The Banana Foster Sundae is a delightful twist on the classic dessert, combining rich flavors of caramelized bananas with creamy vanilla ice cream. This dish offers a perfect balance of sweetness and texture, making it a treat for all banana lovers. It’s surprisingly easy to whip up, making it an excellent choice for a quick dessert fix or a special occasion.
Imagine warm, caramelized bananas served over smooth ice cream, topped with whipped cream and a drizzle of caramel sauce. It’s not only comforting but also visually appealing, making it an impressive dessert to serve guests or enjoy on a cozy night in. Let’s get to the good part—here’s how to make your very own Banana Foster Sundae!
Ingredients
- 2 ripe bananas, sliced
- 2 tablespoons unsalted butter
- 1/4 cup brown sugar
- 1/4 teaspoon cinnamon
- 1 teaspoon vanilla extract
- 1 cup vanilla ice cream
- Whipped cream for topping
- Caramel sauce for drizzling
Instructions
- In a skillet over medium heat, melt the butter.
- Add the sliced bananas and cook for about 2 minutes until they start to soften.
- Sprinkle the brown sugar and cinnamon over the bananas, stirring gently to combine.
- Cook for another 2-3 minutes, allowing the sugar to melt and create a caramel sauce.
- Remove from heat and stir in the vanilla extract.
- In a serving bowl, scoop the vanilla ice cream.
- Top the ice cream with the warm banana mixture.
- Add a generous dollop of whipped cream on top.
- Drizzle with caramel sauce before serving.
Matcha Green Tea Mug Cake
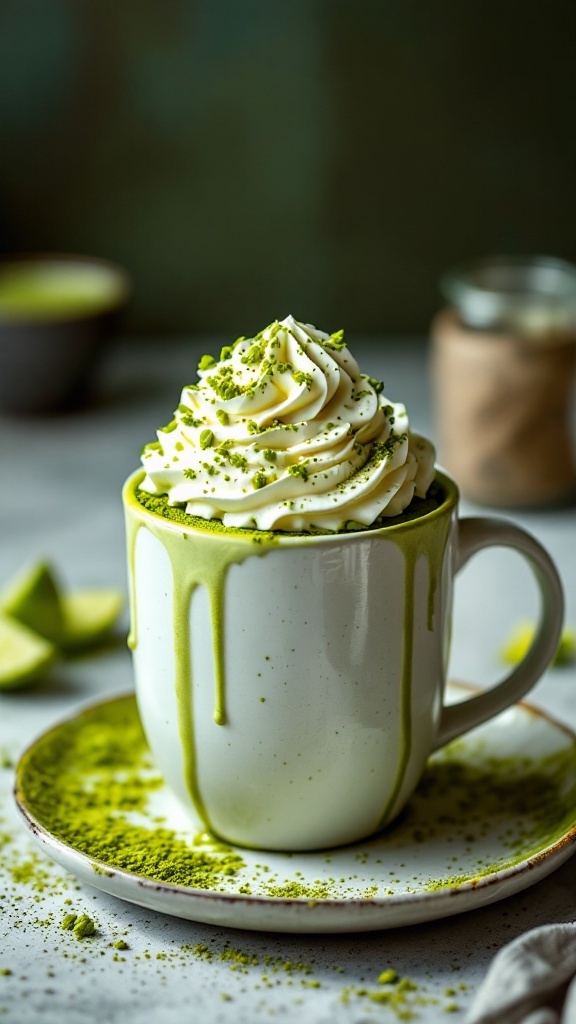
If you’re a fan of matcha, this mug cake is a delightful treat that you can whip up in just a few minutes! It has a gentle earthy flavor from the matcha, complemented by a sponge-like texture that’s both fluffy and satisfying. Perfect for when you need a quick dessert fix, this cake is not only simple to make but also offers a unique twist on traditional desserts.
This recipe is customizable; you can enjoy it plain or top it with whipped cream and a sprinkle of matcha powder for that extra touch. Whether you’re a matcha lover or just curious about its flavor, this mug cake is an easy way to enjoy a little sweet indulgence without the fuss of baking a whole cake.
Ingredients
- 4 tablespoons all-purpose flour (30g)
- 2 tablespoons granulated sugar (25g)
- 1 tablespoon matcha green tea powder (10g)
- 1/8 teaspoon baking powder
- 1/8 teaspoon salt
- 3 tablespoons milk (45ml)
- 1 tablespoon vegetable oil (15ml)
- 1/4 teaspoon vanilla extract
Instructions
- In a microwave-safe mug, combine the flour, sugar, matcha powder, baking powder, and salt. Mix well.
- Add the milk, vegetable oil, and vanilla extract to the dry ingredients. Stir until you have a smooth batter.
- Microwave the mug for about 1 minute or until the cake has risen and is set in the middle.
- Let it cool for a minute before adding your favorite toppings like whipped cream or extra matcha powder.
- Enjoy your quick and tasty matcha mug cake!
Nutella Stuffed Puff Pastry
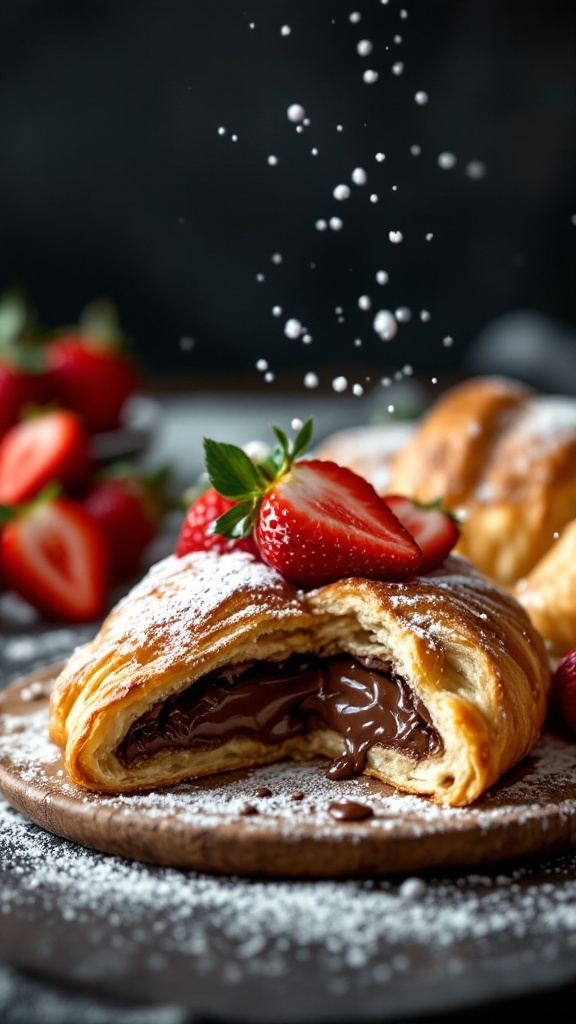
Nutella Stuffed Puff Pastry is a sweet treat that combines the flaky goodness of puff pastry with rich, creamy Nutella. This dessert is perfect for anyone who loves chocolate and wants something quick and easy to make. The contrast of the crispy pastry with the gooey chocolate filling makes every bite delightful. Plus, it’s a single serve dessert, so you can indulge without any leftovers!
Making this treat is simple and requires just a few ingredients. It’s a great option for a cozy night in or when you need to satisfy a sweet craving in a hurry. Whether you enjoy it warm right out of the oven or at room temperature, the Nutella filling is sure to please your taste buds.
Ingredients
- 1 sheet puff pastry (thawed)
- 2 tablespoons Nutella
- 1 egg (beaten, for egg wash)
- Powdered sugar (for dusting)
- Fresh strawberries (for serving)
Instructions
- Preheat your oven to 200°C (400°F) and line a baking sheet with parchment paper.
- Roll out the puff pastry on a lightly floured surface and cut it into squares, about 10 cm (4 inches) each.
- Place a tablespoon of Nutella in the center of each square.
- Fold the pastry over to form a triangle and press the edges to seal. You can use a fork to crimp the edges for a decorative touch.
- Brush the tops with the beaten egg to give them a golden color when baked.
- Bake in the preheated oven for 15-20 minutes or until golden brown.
- Once done, remove from the oven and let them cool slightly before dusting with powdered sugar and serving with fresh strawberries.
Peach Cobbler in a Cup
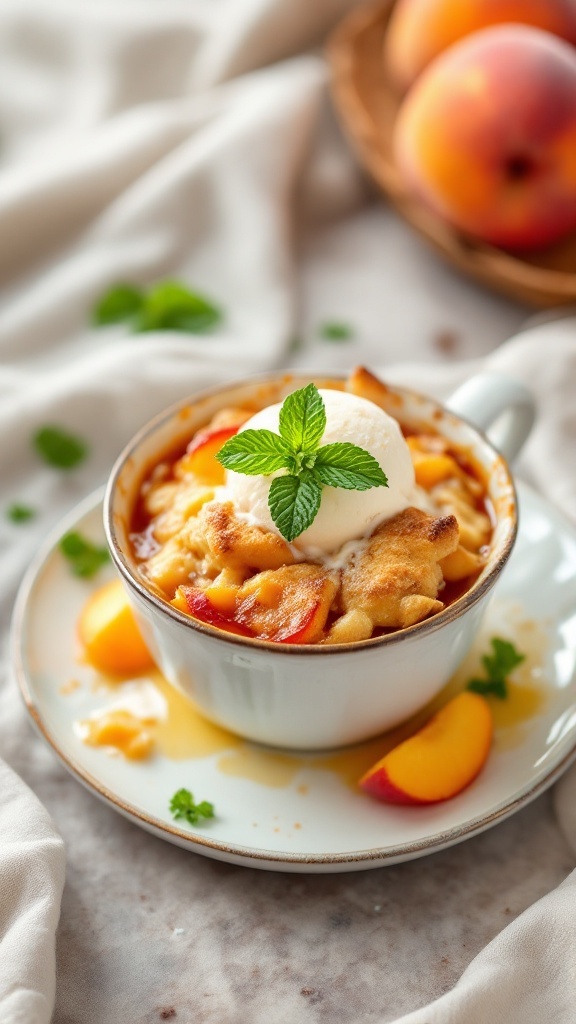
Peach Cobbler in a Cup is a delightful dessert that’s both comforting and easy to prepare. With juicy peaches and a buttery topping, each spoonful offers a warm, sweet treat that feels like a hug. Whether it’s a cozy night in or a quick after-dinner dessert, this single-serve recipe hits the spot without requiring too much time or effort.
This dish brings together the natural sweetness of ripe peaches with a tender biscuit topping, all baked to perfection. The best part? You can enjoy it right from your cup! It’s a great way to satisfy your sweet tooth without making a large batch, perfect for indulging yourself or impressing guests with minimal fuss.
Ingredients
- 1 cup fresh peaches, sliced (about 2 medium peaches)
- 2 tablespoons granulated sugar (25g)
- 1/2 teaspoon ground cinnamon
- 1 tablespoon lemon juice (15ml)
- 1/4 cup all-purpose flour (30g)
- 1/4 cup milk (60ml)
- 1/4 cup unsalted butter, melted (60g)
- 1/2 teaspoon baking powder
- 1/4 teaspoon salt
Instructions
- Preheat your oven to 350°F (175°C).
- In a mixing bowl, combine sliced peaches, granulated sugar, ground cinnamon, and lemon juice. Stir well and set aside.
- In another bowl, mix together the flour, baking powder, and salt. Add in the milk and melted butter, stirring until just combined.
- In an oven-safe cup, layer the peach mixture at the bottom, followed by the biscuit batter on top.
- Bake for about 25-30 minutes, or until the topping is golden brown and a toothpick comes out clean.
- Let it cool for a few minutes, then enjoy it warm, maybe with a scoop of vanilla ice cream!
Raspberry Chocolate Tartlet
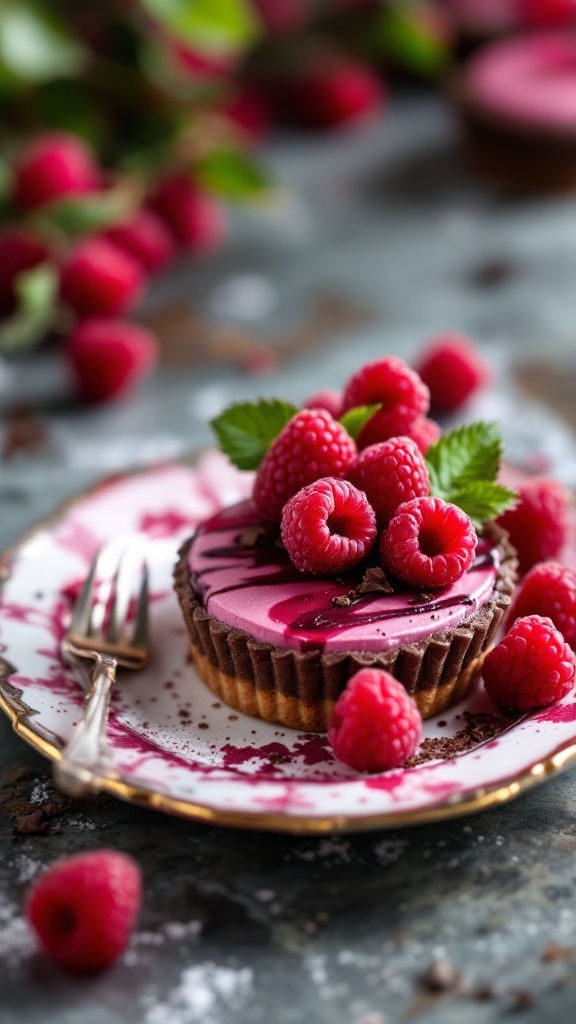
This Raspberry Chocolate Tartlet is a delightful treat that perfectly balances the rich, creamy chocolate with the tartness of fresh raspberries. The combination is not only delicious but also visually appealing, making it a fantastic choice for single servings. It’s simple to prepare, so you don’t need to be a pro in the kitchen to whip this up!
Each bite offers a blend of flavors that dance on your taste buds, making it an ideal dessert for any occasion. Plus, with its individual servings, it’s easy to share or enjoy solo. So grab your ingredients and let’s get started on this sweet journey!
Ingredients
- 100g (3.5 oz) digestive biscuits
- 50g (1.8 oz) unsalted butter, melted
- 150g (5.3 oz) dark chocolate, chopped
- 200ml (0.85 cups) heavy cream
- 100g (3.5 oz) fresh raspberries
- 2 tablespoons raspberry jam
- Mint leaves for garnish (optional)
Instructions
- Preheat the oven to 180°C (350°F).
- Crush the digestive biscuits into fine crumbs and mix with melted butter until combined.
- Press the mixture into the bottom of tartlet pans to form the crust. Bake for 10 minutes, then let cool.
- Melt the dark chocolate in a heatproof bowl over simmering water or in the microwave.
- In another bowl, whip the heavy cream until soft peaks form, then fold in the melted chocolate.
- Pour the chocolate mixture into the cooled crusts and refrigerate for at least 2 hours until set.
- Before serving, top with fresh raspberries and drizzle with raspberry jam. Garnish with mint leaves if desired.
Single Serve Tiramisu Cup
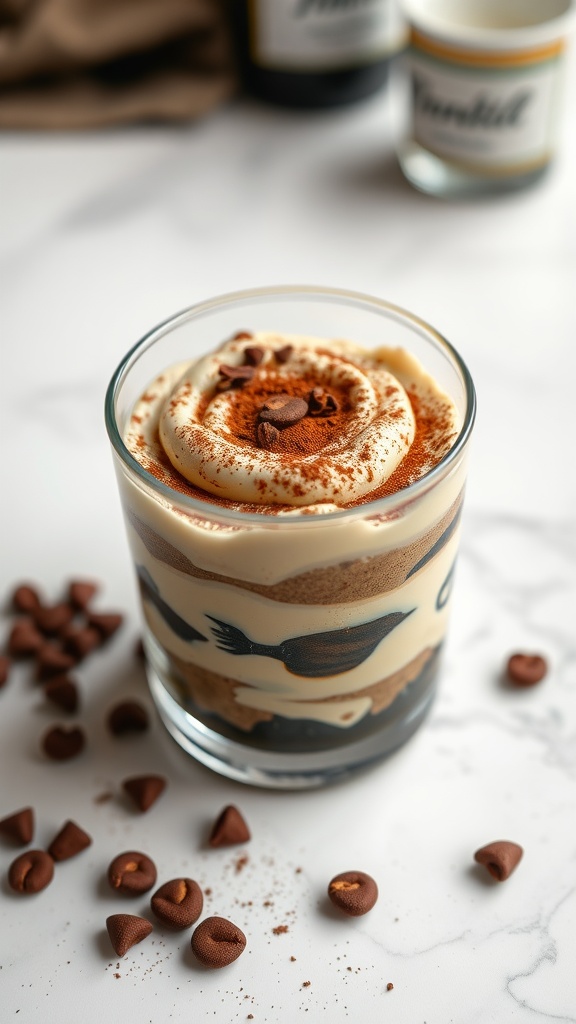
Tiramisu is a classic Italian dessert that layers coffee-soaked ladyfingers with a creamy mascarpone mixture. This single serve version is simple to make and perfect for satisfying your sweet tooth without the fuss of a large cake. It’s rich, smooth, and has a delightful coffee flavor balanced by the sweetness of the cream.
Each cup is a perfect blend of textures, with the soft ladyfingers and the velvety mascarpone. You can whip this up in just a few steps, making it a great option for a quick treat or a special occasion. Plus, the individual servings mean you can enjoy it all to yourself!
Ingredients
- 100g ladyfingers (about 6-8 pieces)
- 120ml strong brewed coffee, cooled
- 2 tablespoons coffee liqueur (optional)
- 250g mascarpone cheese
- 50g granulated sugar
- 1 teaspoon vanilla extract
- Cocoa powder, for dusting
- Chocolate shavings or chips, for garnish
Instructions
- In a shallow dish, combine the coffee with the coffee liqueur if using. Dip each ladyfinger into the coffee mixture quickly, ensuring they’re soaked but not soggy.
- In a mixing bowl, beat together the mascarpone cheese, sugar, and vanilla extract until smooth and creamy.
- In a glass or cup, layer half of the soaked ladyfingers at the bottom.
- Spread half of the mascarpone mixture over the ladyfingers, smoothing it out with a spatula.
- Repeat the layering with the remaining ladyfingers and mascarpone mixture.
- Cover the cup and refrigerate for at least 2 hours to let the flavors meld.
- Before serving, dust the top with cocoa powder and garnish with chocolate shavings or chips.
Chocolate Chip Cookie Dough Cup
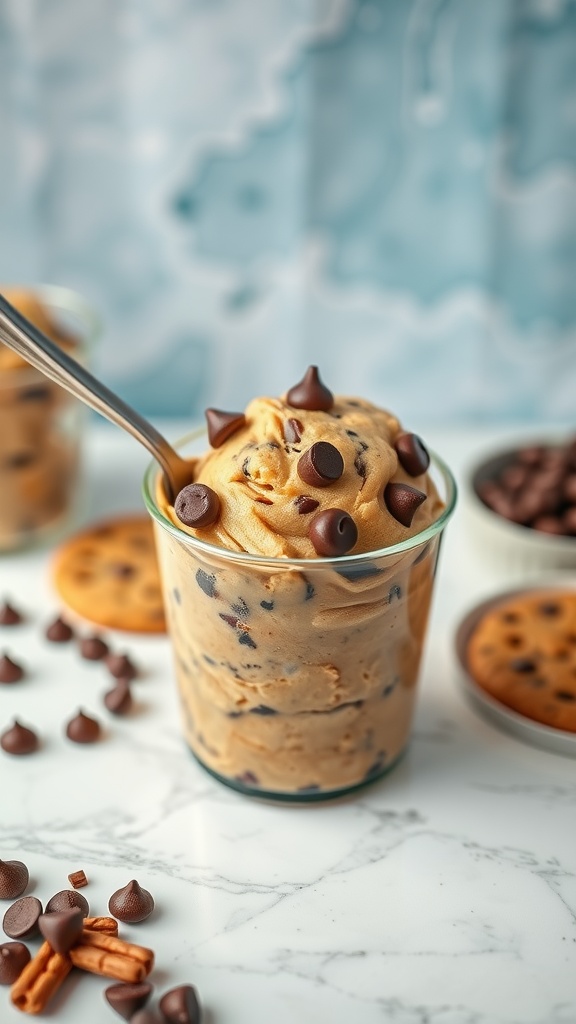
Indulging in a Chocolate Chip Cookie Dough Cup is like enjoying a scoop of nostalgic joy. This delightful treat offers the creamy, sweet flavors of traditional cookie dough, complete with chocolate chips that add a delicious touch. It’s simple to whip up and perfect for satisfying a sweet tooth without the need for baking. The best part is, you can enjoy it straight from the cup, making it a convenient single-serve dessert.
This dessert is not only rich in flavor but also incredibly easy to make, with no complicated steps involved. Just mix, chill, and enjoy! Whether you’re treating yourself after a long day or looking to impress guests, this cookie dough cup will surely hit the spot.
Ingredients
- 75 g (1/3 cup) unsalted butter, softened
- 100 g (1/2 cup) brown sugar, packed
- 50 g (1/4 cup) granulated sugar
- 1 teaspoon vanilla extract
- 100 g (3/4 cup) all-purpose flour
- 1/4 teaspoon salt
- 60 ml (1/4 cup) milk
- 100 g (1/2 cup) chocolate chips
Instructions
- In a mixing bowl, cream together the softened butter, brown sugar, and granulated sugar until smooth.
- Add in the vanilla extract and mix well.
- Gradually incorporate the all-purpose flour and salt, mixing until combined.
- Stir in the milk until the dough reaches a creamy consistency.
- Fold in the chocolate chips.
- Transfer the cookie dough to a cup or bowl and refrigerate for about 30 minutes before serving.
- Enjoy your cookie dough cup straight from the container or with your favorite toppings!
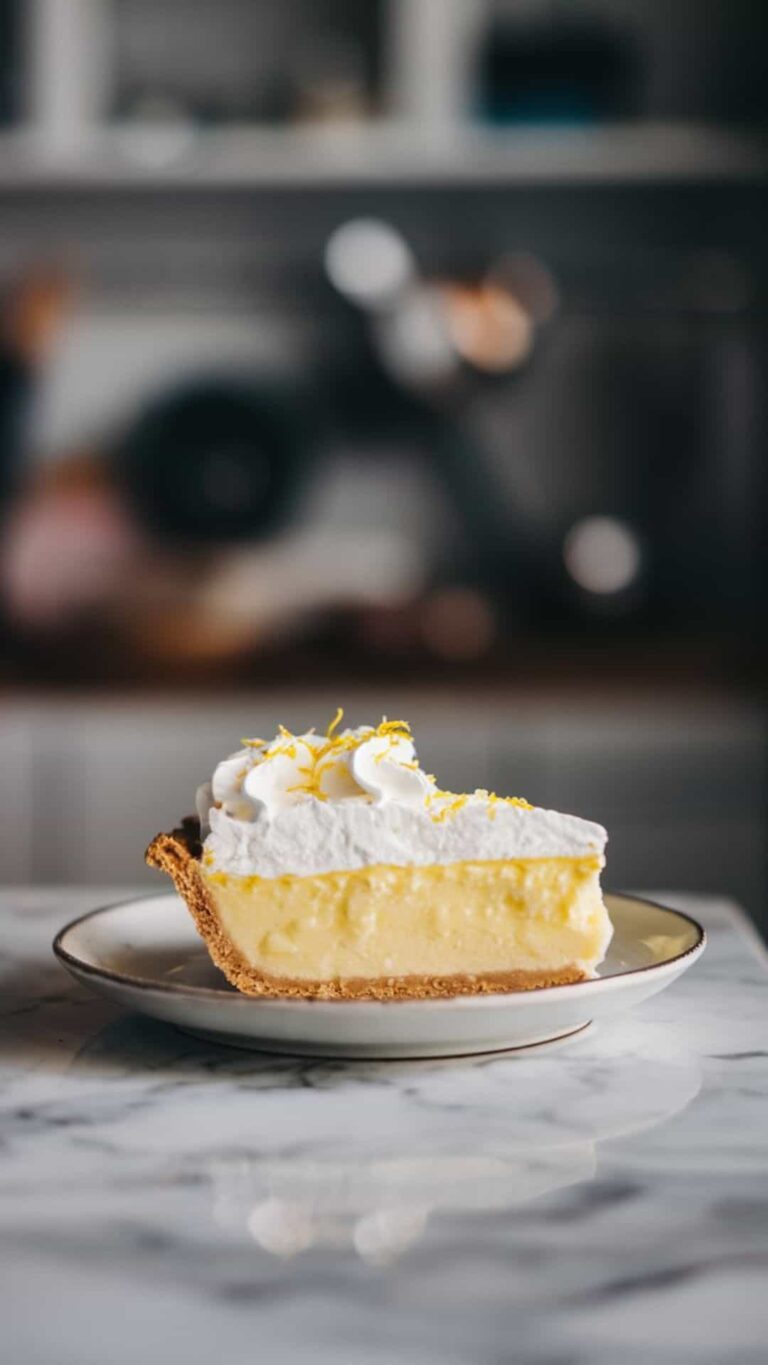
Lemon Mousse in a Jar
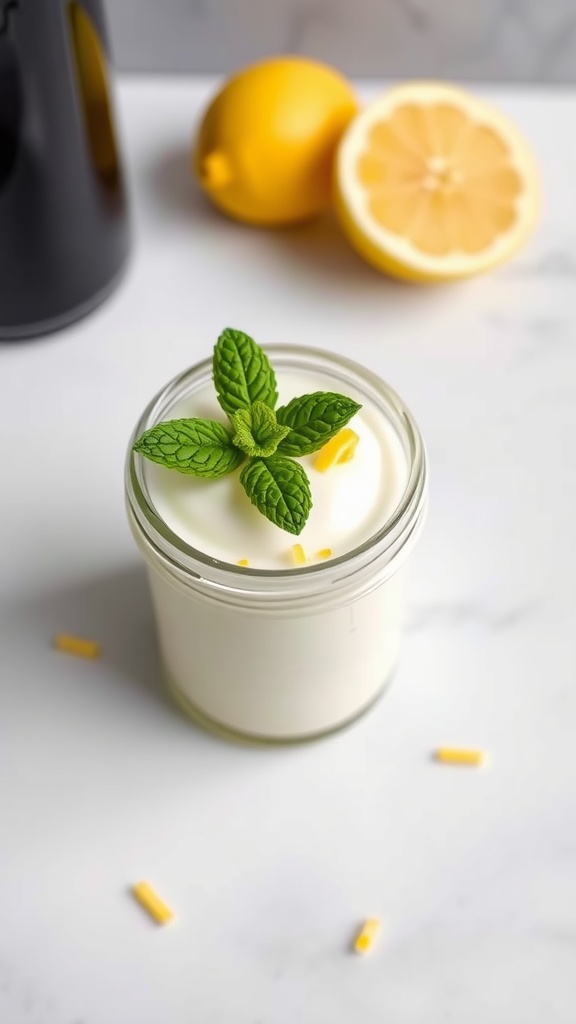
Lemon mousse in a jar is a delightful treat that’s both light and refreshing. With its creamy texture and zesty lemon flavor, it’s the perfect way to satisfy your sweet tooth without feeling heavy afterward. This dessert is surprisingly simple to make, requiring just a few ingredients and minimal effort, making it ideal for a quick indulgence.
Each spoonful bursts with citrus goodness, complemented by a smooth and airy consistency. Whether you’re treating yourself or impressing guests, this lemon mousse is sure to be a hit. Plus, serving it in a jar adds a fun twist, making it not only tasty but visually appealing!
Ingredients
- 240 ml heavy cream (1 cup)
- 120 ml sweetened condensed milk (1/2 cup)
- 60 ml fresh lemon juice (1/4 cup)
- 1 teaspoon lemon zest
- 1 teaspoon vanilla extract
- Pinch of salt
Instructions
- Whip the Cream: In a large bowl, whip the heavy cream until soft peaks form.
- Mix Ingredients: In another bowl, combine the sweetened condensed milk, lemon juice, lemon zest, vanilla extract, and salt. Mix until smooth.
- Fold Together: Gently fold the whipped cream into the lemon mixture until fully combined.
- Chill: Spoon the mousse into jars and refrigerate for at least 2 hours to set.
- Serve: Enjoy chilled, possibly garnished with mint or lemon slices!
Chocolate Lava Cake in a Mug
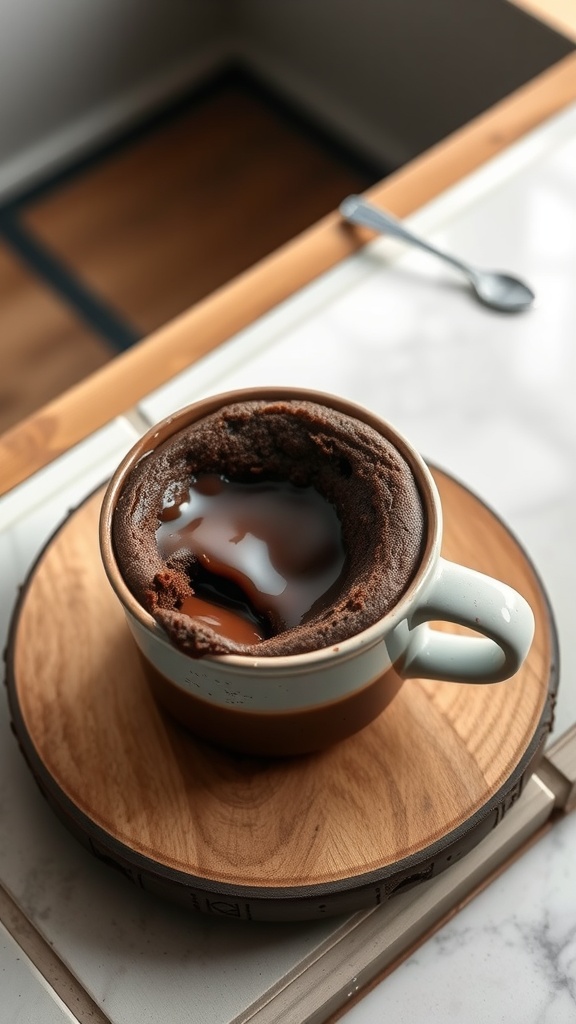
If you’re craving a warm, chocolatey treat that’s quick and easy to whip up, Chocolate Lava Cake in a Mug is just the thing. This delightful dessert offers a rich and gooey center that’s hard to resist. Ideal for solo indulgence or a late-night snack, it can be made in just a few minutes with simple ingredients you likely already have at home.
The best part? You don’t need an oven! Just a microwave will do. With its molten chocolate center, this dessert brings all the comfort you desire, making it a perfect sweet escape. Plus, it’s so easy that even novice cooks can master it without breaking a sweat.
Ingredients
- 4 tablespoons all-purpose flour (60 g)
- 4 tablespoons granulated sugar (50 g)
- 2 tablespoons unsweetened cocoa powder (15 g)
- 1/8 teaspoon salt
- 2 tablespoons vegetable oil (30 ml)
- 2 tablespoons milk (30 ml)
- 1/4 teaspoon vanilla extract
- 1 tablespoon chocolate chips (optional)
Instructions
- In a microwave-safe mug, mix together the flour, sugar, cocoa powder, and salt until well combined.
- Add the vegetable oil, milk, and vanilla extract to the dry ingredients and stir until a smooth batter forms.
- If using, stir in the chocolate chips for extra gooeyness.
- Microwave the mug on high for 30-40 seconds. The cake should rise but still be a bit soft in the center.
- Let it cool for a minute before digging in. Enjoy your chocolate lava cake straight from the mug!
Chocolate Avocado Mousse
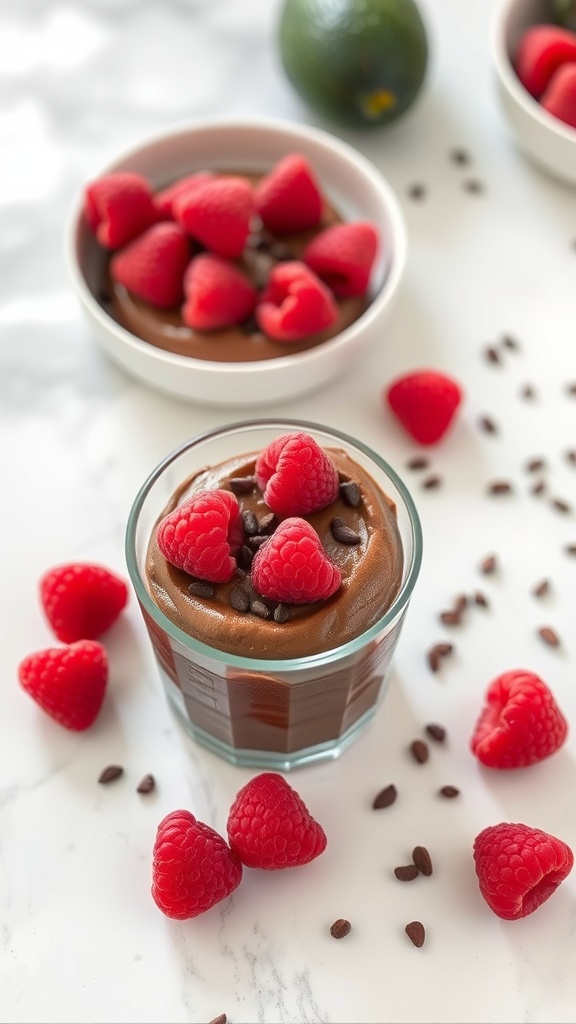
This Chocolate Avocado Mousse is a delightful treat that combines rich chocolate flavor with the creamy texture of avocados. It’s surprisingly simple to make and perfect for satisfying that sweet tooth without the guilt. The combination of ripe avocados and cocoa powder creates a luscious dessert that is both decadent and nutritious.
With a hint of sweetness and a smooth consistency, this mousse is a great way to enjoy dessert without loading up on sugar. Plus, it’s versatile enough to be topped with fresh fruits like raspberries or a sprinkle of chocolate chips. Whether you’re looking for a quick dessert for one or want to impress guests, this recipe is the answer!
Ingredients
- 1 ripe avocado
- 3 tablespoons unsweetened cocoa powder
- 2 tablespoons honey or maple syrup
- 1 teaspoon vanilla extract
- 2 tablespoons almond milk (or any milk of your choice)
- A pinch of salt
- Fresh raspberries and chocolate chips for topping (optional)
Instructions
- Prepare the Avocado: Cut the ripe avocado in half, remove the pit, and scoop the flesh into a blender or food processor.
- Add the Ingredients: To the avocado, add cocoa powder, honey (or maple syrup), vanilla extract, almond milk, and a pinch of salt.
- Blend Until Smooth: Blend all ingredients together until you achieve a creamy and smooth consistency. If it’s too thick, add a little more almond milk.
- Taste and Adjust: Taste the mousse and adjust sweetness as needed by adding more honey or maple syrup.
- Serve: Spoon the mousse into a serving dish or glass. Top with fresh raspberries and chocolate chips if desired.
- Chill (Optional): For a cooler treat, refrigerate for about 30 minutes before serving.
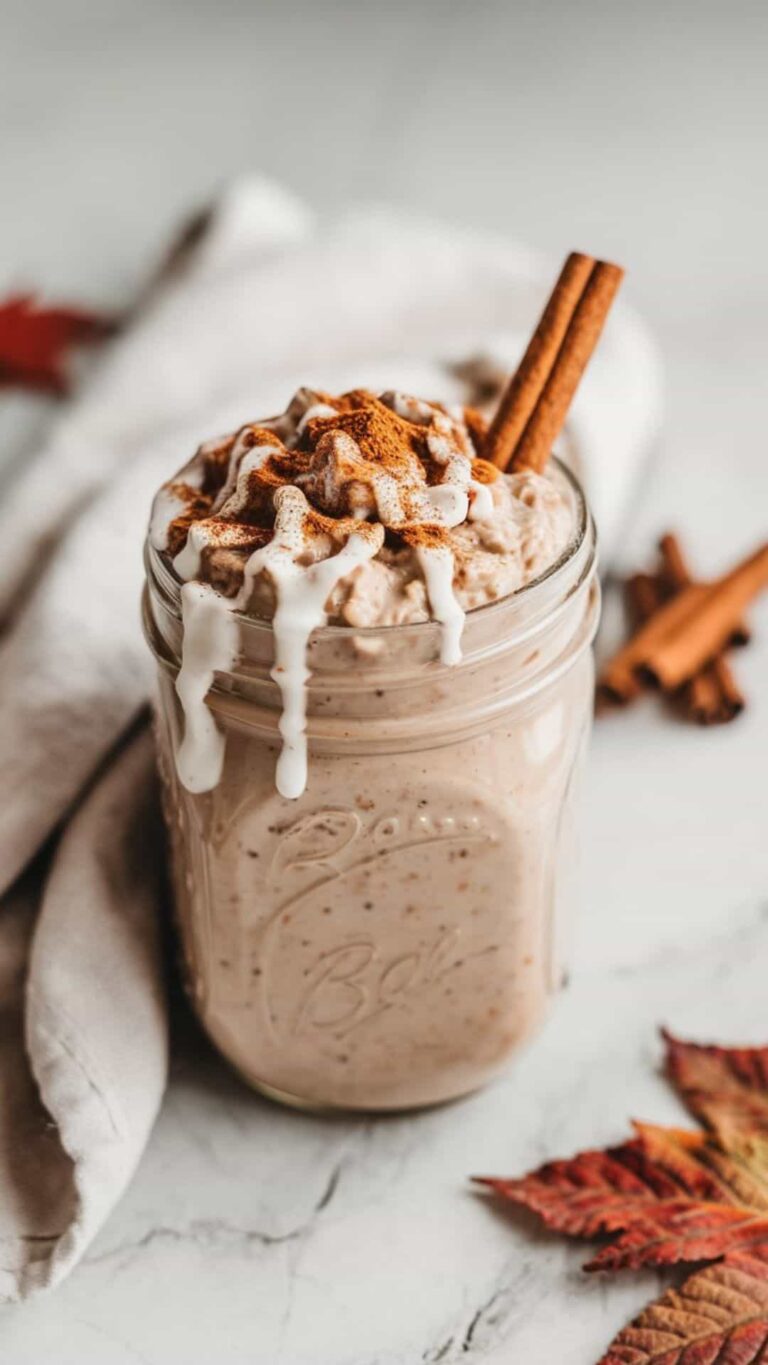
Apple Crisp in a Mug
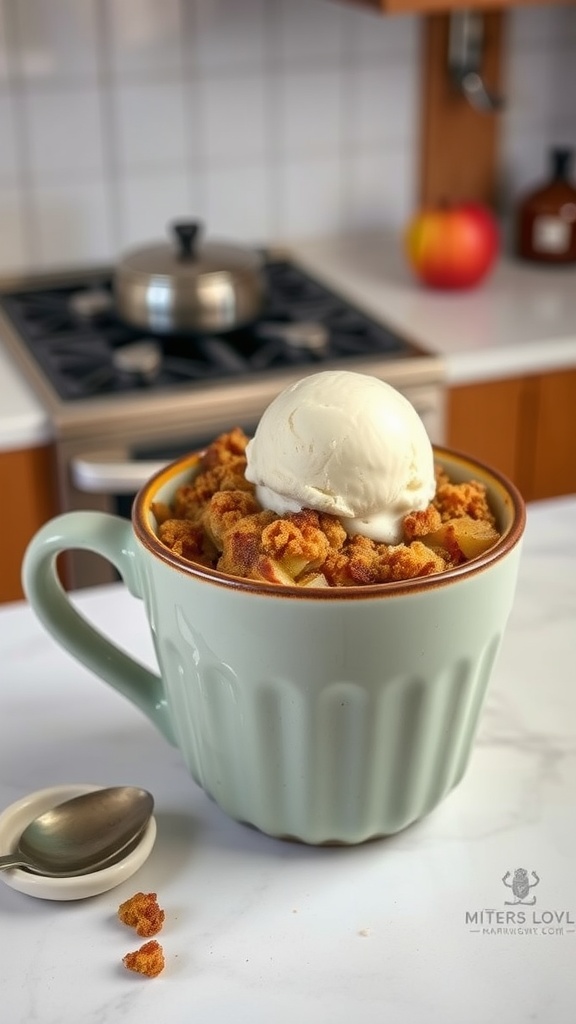
Apple Crisp in a Mug is a delightful single-serving dessert that combines warm, spiced apples with a crunchy topping. The sweetness of the apples paired with a hint of cinnamon gives it a comforting taste that’s perfect for any time of year. Making this dessert is a breeze, requiring just a few ingredients and minimal prep time, so you can enjoy a homemade treat without the fuss.
Whether you’re craving a late-night snack or a quick dessert after dinner, this apple crisp in a mug is sure to satisfy your sweet tooth. Plus, it’s easy to customize with your favorite toppings like ice cream or whipped cream. In just a few minutes, you can have a delicious treat that feels like a warm hug on a chilly day.
Ingredients
- 1 medium apple, peeled and diced
- 2 tablespoons granulated sugar (25 g)
- 1/2 teaspoon ground cinnamon
- 1 tablespoon all-purpose flour (8 g)
- 3 tablespoons rolled oats (30 g)
- 2 tablespoons brown sugar (25 g)
- 1 tablespoon unsalted butter, melted (14 g)
Instructions
- In a microwave-safe mug, combine the diced apple, granulated sugar, and cinnamon. Stir well to coat the apples.
- In a separate bowl, mix the flour, oats, brown sugar, and melted butter until crumbly.
- Sprinkle the oat mixture over the apples in the mug.
- Microwave on high for about 1-2 minutes, or until the apples are soft and the topping is golden brown.
- Let it cool for a minute before enjoying. Top with ice cream or whipped cream if desired.
Coconut Rice Pudding
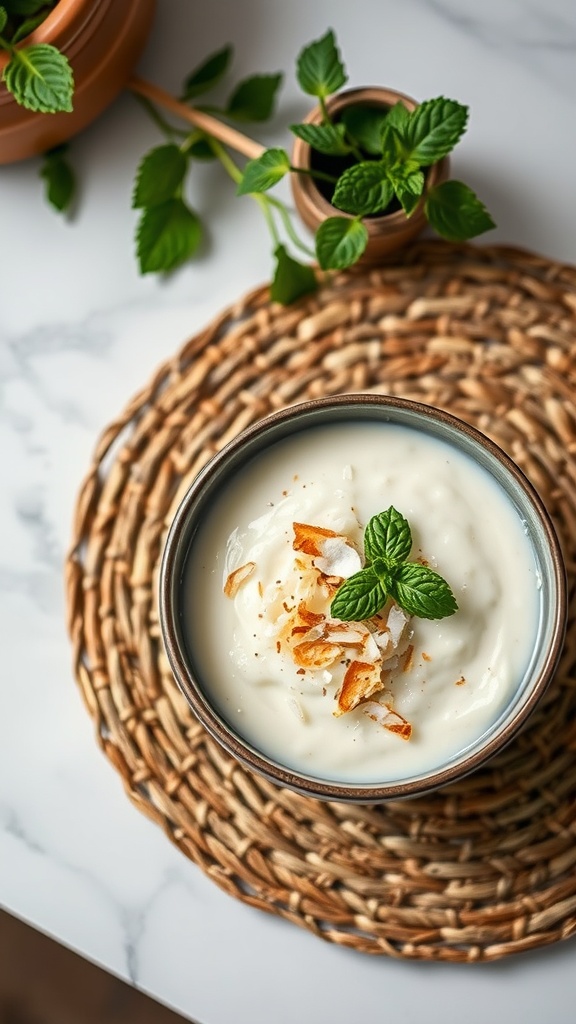
Coconut rice pudding is a creamy and comforting dessert that feels like a warm hug in a bowl. This dish combines the sweetness of coconut milk with the subtle flavors of vanilla and a hint of nutmeg, making each spoonful a delightful experience. It’s simple to whip together, so you can enjoy a cozy dessert without spending hours in the kitchen.
The texture is rich and smooth, with the rice adding a satisfying bite. Topped with toasted coconut flakes and a sprig of mint, this pudding not only tastes good but looks appealing too. Whether you’re having a quiet evening at home or entertaining friends, this single-serve dessert is sure to please.
Ingredients
- 100g (1/2 cup) arborio rice
- 400ml (1 1/2 cups) coconut milk
- 200ml (3/4 cup) water
- 50g (1/4 cup) granulated sugar
- 1/2 teaspoon vanilla extract
- A pinch of salt
- 20g (1/4 cup) toasted coconut flakes
- Fresh mint leaves for garnish
Instructions
- Rinse the arborio rice under cold water until the water runs clear. Drain well.
- In a medium saucepan, combine the rinsed rice, coconut milk, water, sugar, and salt. Bring to a gentle simmer over medium heat.
- Reduce the heat to low and cook, stirring frequently, for about 25-30 minutes or until the rice is tender and the mixture is creamy.
- Remove from heat and stir in the vanilla extract. Let it sit for 5 minutes to thicken slightly.
- Serve in individual bowls, topped with toasted coconut flakes and a mint garnish. Enjoy warm or chilled!
Banana Foster Bread Pudding
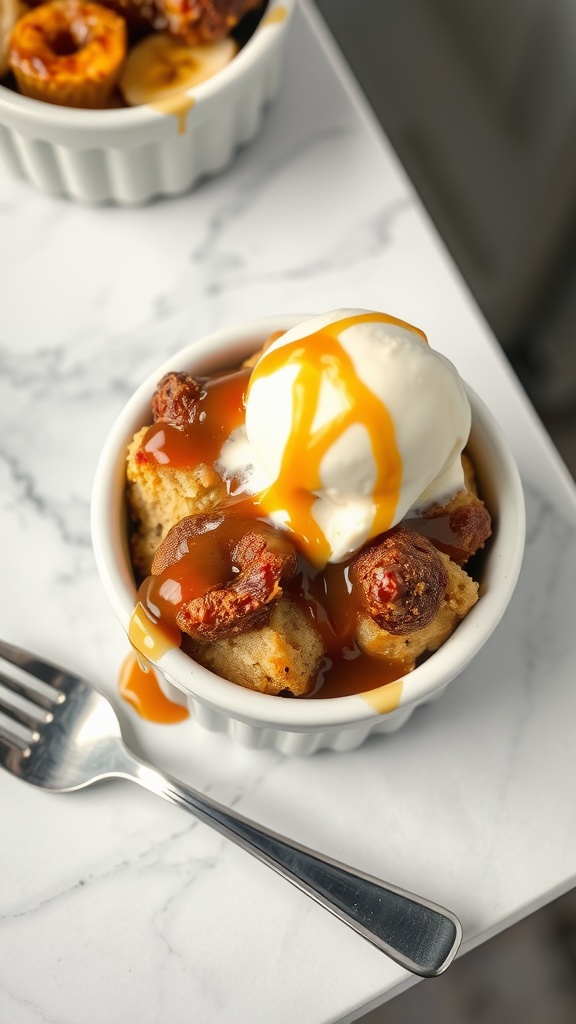
Banana Foster Bread Pudding is a cozy dessert that brings together the comforting flavors of rich bread pudding with the tropical sweetness of bananas. This delightful treat is topped with a warm caramel sauce, making it a perfect indulgence for any time of the day. If you love bananas and a hint of rum flavoring, this simple recipe is sure to satisfy your cravings.
With minimal effort and just a few key ingredients, you can whip up a warm, delicious dessert that feels fancy but is incredibly easy to prepare. It’s ideal for a cozy night in or impressing guests at a small gathering!
Ingredients
- 2 cups stale bread, cubed
- 1 ripe banana, sliced
- 1 cup whole milk
- 1/2 cup heavy cream
- 1/4 cup granulated sugar
- 2 large eggs
- 1 teaspoon vanilla extract
- 1/2 teaspoon ground cinnamon
- 1/4 cup dark rum (optional)
- 1/4 cup brown sugar
- 2 tablespoons unsalted butter
- Vanilla ice cream, for serving
Instructions
- Preheat your oven to 350°F (175°C). Grease a small baking dish.
- In a large bowl, combine the cubed bread and sliced banana.
- In another bowl, whisk together the milk, heavy cream, granulated sugar, eggs, vanilla extract, cinnamon, and rum (if using).
- Pour the mixture over the bread and banana, ensuring all the pieces are soaked.
- Let it sit for about 10 minutes to absorb the liquid.
- Transfer the mixture into the greased baking dish.
- In a small saucepan, melt the butter with the brown sugar over medium heat, stirring until smooth. Drizzle this mixture over the bread pudding.
- Bake for 30-35 minutes until the top is golden and the pudding is set.
- Serve warm with a scoop of vanilla ice cream on top.
Raspberry Crumble in a Jar
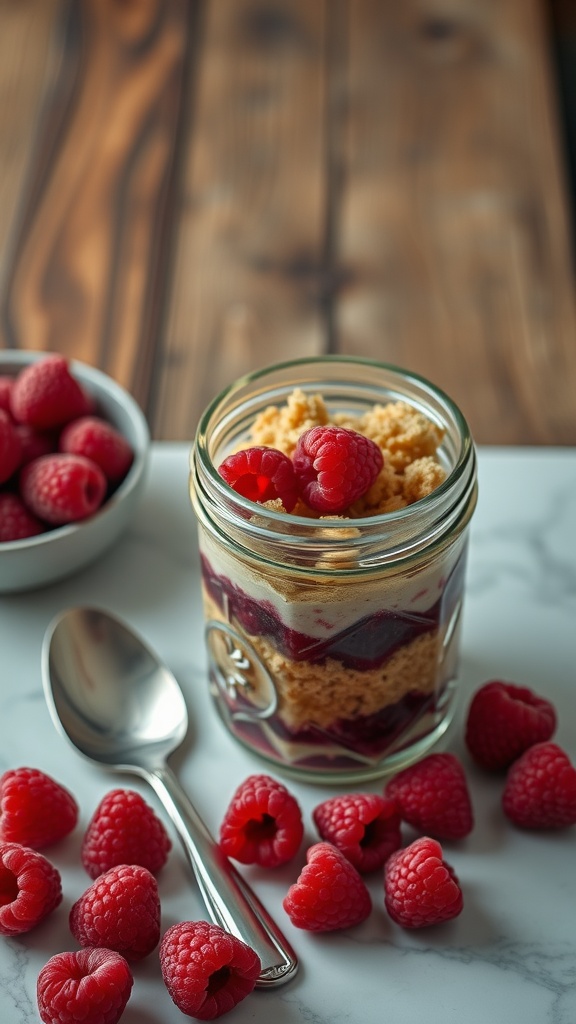
Raspberry Crumble in a Jar is a delightful dessert that blends sweet and tart flavors in every spoonful. The freshness of ripe raspberries paired with a buttery crumble creates a satisfying treat that’s perfect for any occasion. Not only is it delicious, but it’s also a breeze to whip up, making it a great choice for anyone looking to indulge without a lot of fuss.
This dessert serves well in individual jars, allowing for easy serving and a lovely presentation. Each layer offers a different texture, from the juicy raspberries to the crunchy crumble, all harmonizing beautifully. Grab a spoon and dig into this quick and easy dessert that can be made ahead of time!
Ingredients
- 250g fresh raspberries
- 50g granulated sugar
- 1 tablespoon cornstarch
- 100g all-purpose flour
- 50g rolled oats
- 75g unsalted butter, melted
- 30g brown sugar
- 1/2 teaspoon vanilla extract
Instructions
- Prepare the Raspberries: In a bowl, combine fresh raspberries, granulated sugar, and cornstarch. Gently mix until the raspberries are coated, then set aside.
- Make the Crumble: In another bowl, mix flour, rolled oats, brown sugar, and melted butter. Stir until crumbly and well combined.
- Layer the Ingredients: In small jars, place a layer of the raspberry mixture, followed by a layer of the crumble. Repeat the layers until the jars are filled.
- Bake: Preheat your oven to 350°F (175°C) and place the jars on a baking sheet. Bake for 15-20 minutes until the crumble is golden and the raspberries are bubbling.
- Cool and Serve: Remove from the oven and let cool slightly before serving. Enjoy warm or at room temperature!
Matcha Green Tea Cupcake
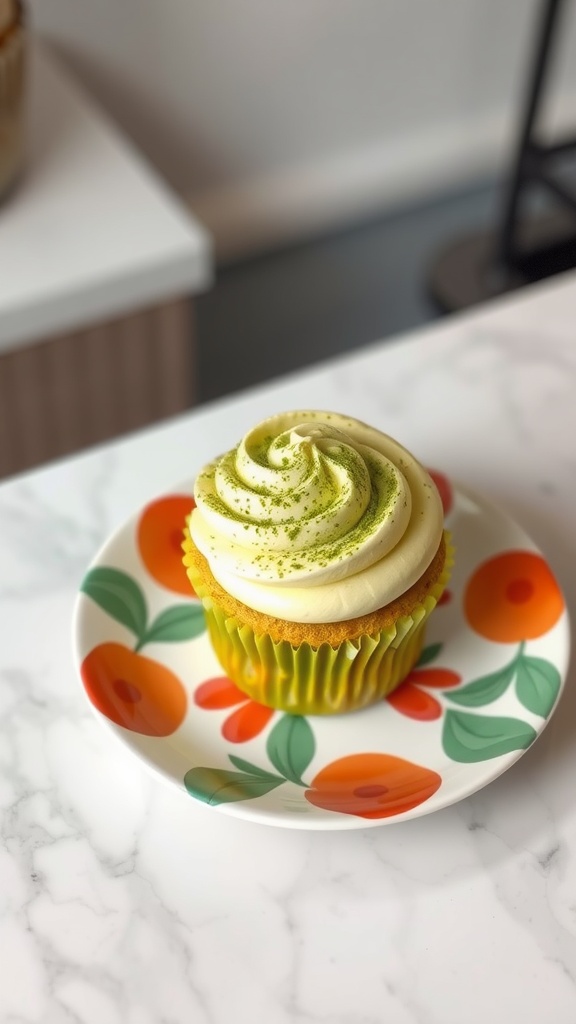
Matcha green tea cupcakes are a delightful blend of sweet and earthy flavors that offer a unique twist on the classic cupcake. These treats are light and fluffy, with the vibrant taste of matcha providing both a beautiful color and a subtle bitterness that balances perfectly with a creamy frosting. They are easy to whip up, making them a great choice for both baking novices and seasoned pros.
With just a few simple ingredients, you can create these charming single-serve desserts that not only taste delicious but also look impressive. Whether you’re serving them at a party or enjoying them as a personal treat, matcha green tea cupcakes are sure to please.
Ingredients
- 120g (1 cup) all-purpose flour
- 200g (1 cup) granulated sugar
- 2g (1/2 teaspoon) baking powder
- 1g (1/4 teaspoon) baking soda
- 1g (1/4 teaspoon) salt
- 2 large eggs
- 120ml (1/2 cup) milk
- 60ml (1/4 cup) vegetable oil
- 10g (2 teaspoons) matcha green tea powder
- 1 teaspoon vanilla extract
- 120g (1 cup) butter, softened
- 250g (2 cups) powdered sugar
- 60ml (1/4 cup) heavy cream
Instructions
- Preheat your oven to 350°F (175°C) and line a cupcake tin with cupcake liners.
- In a large bowl, whisk together the flour, sugar, baking powder, baking soda, and salt.
- In a separate bowl, whisk the eggs, milk, vegetable oil, matcha powder, and vanilla until smooth.
- Combine the wet and dry ingredients, mixing until just combined. Be careful not to overmix.
- Divide the batter evenly among the cupcake liners, filling each about two-thirds full.
- Bake for 18-20 minutes or until a toothpick inserted into the center comes out clean. Let them cool completely.
- For the frosting, beat the softened butter until creamy. Gradually add the powdered sugar, then mix in the heavy cream until smooth.
- Frost the cooled cupcakes and dust with a little extra matcha powder for garnish before serving.